Changing the Color of Radio Display and Controls
After changing the instrument lights' color, matching the radio was a logical next step. So I took the radio out of the car; removed the face assembly; and separated the assembly into its main components. This was all pretty easy. Thank you, Honda!
Figure 1 shows the control and display circuit board. Note the nine blue dots: These are color filters, one on each bulb. Removing the filters eliminates a blue-green tint and obtains maximum light from the bulbs. If I had red filters of this size, I could put them in place, and be done. No such luck!
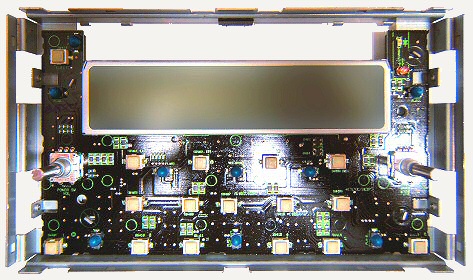
Figure 1
Figure 2 shows the back side of the outer face and button assembly. The clear pieces are light diffusers, which allow just nine bulbs to illuminate all the displays. The raised, stepped areas make it prohibitively difficult to simply overlay a sheet of colored film.

Figure 2
|
Fortunately, the front side of the lower diffuser is more regular—though not perfectly so.
It has 16 protuberances:
four for the top row of buttons, five for the middle row, six for the bottom row, and one for the SEEK/SKIP label. I placed a sheet of rubylith film over the diffuser and carefully cut holes corresponding to the flat tops of the protuberances. Then I peeled the film off its carrier and laid it over the piece, allowing the raised parts to protrude through the cutouts. The tops were covered next. Rubylith tape was used on the knob surrounds and relevant parts of the upper diffuser. The large window in the faceplate was covered with amberlith, as ruby is too dark for the LCD. The final result is seen in Figure 4. Later, I was inspired to give the same treatment to the XM RoadyXT, which unlike its predecessor Roady2, allows the user to change the color of the text display but not the buttons. |
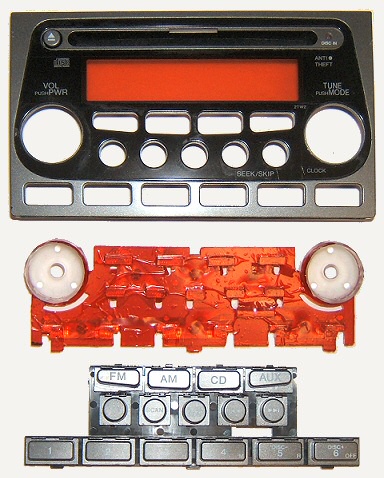 Figure 3: from top, faceplate with amberlith over LCD window; lower diffuser with rubylith applied; buttons and carrier |
Figure 4