Changing the Color of XM RoadyXT Controls
Subsequent to changing the color of my EX radio controls, I upgraded my XM receiver to the RoadyXT. Though it has advantages over the Roady2, there was one step back in the design: When you select a display color on the Roady2, all the buttons change to match. The RoadyXT changes only the LCD backlight color, while all the buttons remain white. That just won't do.
Fortunately, taking the XT apart isn't too hard. There are two small rubber feet on the lower back of the unit. Prying them out reveals tiny Torx screws (size T6). Remove the screws, then separate the two halves of the case starting at the bottom. Be careful not to break the black plastic strip across the top, which has sets of barbs molded into it that allow the top halves of the case to snap together.
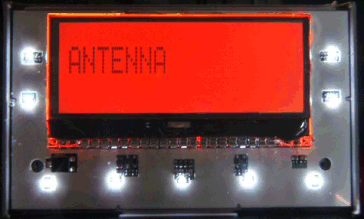
The disassembled receiver is in Figure 1, showing the display in orange ("sunset") mode and the locations of the nine white LEDs that illuminate all the buttons. You can also see little bits of circuitry (ICs) near or adjacent to the lights. What you can't really see in the photo are the little bumps that the buttons engage to activate the microswitches beneath the white plastic membrane.
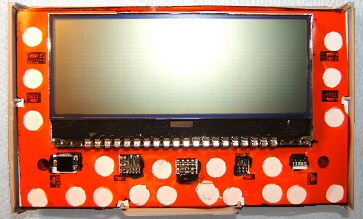
In Figure 2, an amberlith mask covers the LEDs. It would have been easier to cover each light individually with a small piece of film, but I was afraid the pieces would eventually shift, so I cut a full-size mask with rectangular cutouts for the ICs and round holes for the switch points.
 Figure 1 |
 Figure 2 |
|
The amber turned out to be a little too bright for my taste, so I went back and replaced it with
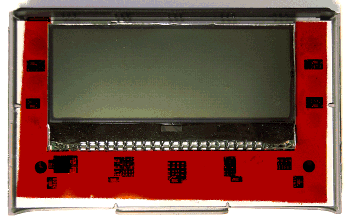
rubylith. This time I cut a simple shape (Figure 3).
Because the rubylith is so thin, it doesn't interfere with the operation of the buttons at all.
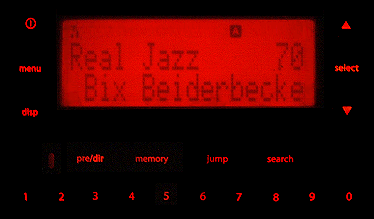
And I really like the color (Figure 4). The original white buttons were a distraction at night, and the red ones are not. The new display is also a nice match with my red instrument gauges, red/orange radio display, and red HVAC controls. |
||
 Figure 3 |
 Figure 4 |
|